Showing posts with label recipe. Show all posts

Monday, August 20, 2012

Tortellini with Fresh Tomatoes and Corn and some other recipes using Fresh Tomatoes!

It's that time of year...where we are absolutely drowning in tomatoes. We're actually quite excited about it since our little 4 foot by 20 foot garden took a back seat this year. The weather's been weird for the past month..it's either raining cats and dogs or so humid out I can't even bear the thought of drying my hair only to have it poof out all weird an hour later. We've have some bigger things going on and I just didn't get to put the time and effort into the garden that I normally do. That, coupled with the effort to not use any type of chemicals and pesticides...the garden took a bit of a hit...it might look a little sad, but it's been producing a decent amount! I think we picked over 10 lbs of tomatoes in the past 2 weeks...so it was off to my friend Mr. Google to find some new recipes...

I picked this on Saturday alone!


This recipe from Southern Living caught my eye..I wanted some recipes that I could use freshly cut up tomatoes in vs. cooking them down to make a sauce etc. This was relatively easy to make and I love using fresh seasonal things like corn and scallions. I initially thought that recipes from Southern Living would involve deep frying my tomatoes..but was pleasantly surprised to see that this wasn't that bad nutrition wise!

Here's what dinner..aka Tortellini with fresh tomatoes and fresh corn in a lemon parmesan vinaigrette looked like last night...


Tortellini with Fresh Tomatoes and Corn
from Southern Living

Two 9oz packages of refrigerated tortellini
1/2 cup olive oil
1/2 cup freshly grated Parmesan Cheese
3 Tbsp of freshly squeezed lemon juice (juice of 1 lemon)
2 garlic cloves
1 tsp Worcestershire sauce
1/2 tsp salt
2 cups of any type of tomatoes, chopped
1 cup fresh corn kernels
1/2 cup sliced scallions
1/2 cup coarsely chopped basil
salt and pepper to taste

Cook tortellini according to package directions. In a food processor, pulse together olive oil, cheese, lemon juice, garlic, Worcestershire, and salt. . Toss vinaigrette with tomatoes, corn, scallions. Once tortellini is done, drain and add to the mixture. Top with chopped basil and season, if necessary, with salt and pepper.

Some other recipes I love for this time of year....

Fresh Tomatoe Sauce by Smitten Kitchen. Super easy and a nice chunky sauce that I make every year.

Cherry Tomato and Basil Pasta from Food Network's Elie Krieger...so easy to make and a great way to use up cherry tomatoes!

Enjoy!

Wednesday, June 13, 2012

Beer Butt Chicken

I've been wanting to try this method of cooking a chicken for quite some time. We participate in a meat CSA through a local farm and my husband's favorite item is hands down the little roasting chickens. They're hard to cook during the summer months..the last thing I want to do is turn on an oven at 400 degrees. So, I thought we'd give this method a whirl....

It was pretty simple. I washed the chicken, rubbed it with a little olive oil, and sprinkled him with salt and pepper. I took a can of beer...Mr. Allan's choice this weekend to accompany him during his yard work was Bud Light Lime. We emptied, aka Mr. Allan drank, half of the beer. We took the half full can of Bud Light and sat the chicken right on it. I let the grill heat up. We have a 3 burner gas grill. Most tips I read about cooking the chicken this way advised to not sit it on direct heat. I had the furthest burner on a higher temp and the chicken was placed over a burner that was not on..our version of "indirect heat"


I left the chicken on the grill undisturbed for 1 hour. At the hour mark, we took a peek and let him cook for an additional 30 minutes. This was the chicken after the full cooking time.


I was really surprised by this. It was so easy to cook the chicken this way and the end result was an extremely moist chicken with a nice crisp skin. Usually I make the husband carve the chicken so I don't have to eat it off the bone..lucky for me he's a former Kenny Roger's Roasters employee and can carve a mean chicken...but, he just cut into quarters and it was excellent!

Beer Butt Chicken

4-5 lbs roasting chicken
Olive oil
Salt and pepper
1 half full can of beer..any will do

Directions

 Pre heat one burner of a gas grill. If you're using a charcoal grill, have the heated charcoal on one side of the grill.

Rinse chicken. Rub with olive oil and season with salt and pepper.

Take 1 beer can that is half full of beer. Place the beer can in the cavity of the chicken..aka sit the chicken on the beer can. Place on the unheated side of the grill. Cook for 1 1/2 hours.

After 1 1/2 hours, either check the temp or cut into the chicken to make sure the juices run clear.


Tuesday, June 5, 2012

Buffalo Chicken Burgers

My nutrition savvy friend, J, gets credit for introducing me to this website and this recipe! I'm usually too lazy to make my own burgers..they'rejust so easy to buy pre-made at Whole Foods..but this recipe really caught my eye. I feel like I associate buffalo chicken with fried chicken tenders or wings...foods I try and steer clear of and really hadn't thought to make a chicken burger!

So, I thought this would be a great weekend dinner since the weather has warmed up and we're spending most nights grilling and eating dinner on the deck. The recipe did not disappoint and I love this website..Prevention RD. It's the little tips..like be careful when buying your ground chicken and make sure it's ground chicken breast since most pre packaged ground chicken at grocery stores contain white meat, dark meat, and skin.

Overall, we really enjoyed these, the recipe wasn't too hard (it was something I put together one night, threw in the fridge, and grilled up the next night.) I followed the recipe to a T..with the exception of dicing my red onion up and I sauteed it for 5 minutes before mixing it in..I just have this weird phobia with raw red onions..hate them!


Buffalo Chicken Burgers  (from http://www.preventionrd.com/)

1 lb ground chicken breast
1/4 tsp garlic powder
1/4 small red onion, finely diced
1 tsp Italian seasoning
1 to 2 tsp crushed red pepper
1/4 cup plain bread crumbs (I used Whole Wheat from Whole Foods..turned out great!)
pinch of salt and pepper, to taste
1 Tbsp olive oil
2 Tbsp buffalo wing sauce
4 whole wheat hamburger buns (Ezekial is the choice of our house!)
2 oz crumbled blue cheese
2 Tbsp buffalo wing sauce (extra to top off your burger!)

In a large bowl, mix the ground chicken with the following 8 ingredients (through wing sauce). Divide into 4 equal patties.

Preheat a grill, or the oven to 375 F.

Grill for 3-5 minutes per side (depending on thickness) or bake in a baking dish sprayed with non-stick cooking spray for 15 minutes.

Serve with 1/2 ounce crumbled blue cheese and 1/2 tablespoon of buffalo wing sauce. Serve with your favorite coleslaw topping for an added touch!

Yield: 4 burgers.

Nutrition Information (per burger with blue cheese and additional wing sauce – no slaw): 351 calories; 11.3 g. fat; 75 mg. cholesterol; 825 mg. sodium; 31.5 g. carbohydrate; 2.5 g. fiber; 33 g. protein

Wednesday, April 18, 2012

What I'm Loving Wednesday!


Time for another week of What I'm Loving Wednesday...sometimes I surprise myself that I can actually come up with stuff each week! So, here we go.....

First up...the weather has finally taken a turn for the warmer here in RI! Temps in the 70's and 80's call for a nice frozen treat...one of my favorite picks....Edy's Fruit Bars. My favorite flavor...Grape..mostly because it's kind on the calories at 80 calories per a pop!

I'm also loving the new show, Scandal, on ABC Thursdays at 10pm. I caught the first episode and thought it was good, and then got hooked once I watched the second episode. I'm typically not really into political dramas...but love the little secrets of Washington that make this show work!

The show stars Kerry Washington as Olivia Pope...the woman who fixes all the big scandals in the nation's capital!


I'm also loving that it's the season (well at least in New England) to finally get some good avocados! I have an obsession with avocados..my absolute favorite thing to make...guacamole!

I like to think I make a mean guacamole..it's an absolute favorite in the Allan household and I feel like I make it at least every other week. It's great to dip veggies or chips in or even plop a little bit on top of your burger! For my recipe, click HERE


Enjoy your Wednesday and be sure to check out the What I'm Loving Wednesday blog hop at www.littledaisymay.blogspot.com !

Monday, April 2, 2012

Calico Baked Beans

or as we like to call them...Annabelle beans..after our cute little calico cat :)

yesterday morning I woke up and we did our usual lazy Sunday morning routine..Mr. Allan fed the cats and made himself some coffee...he then came back into our bedroom where we read the Sunday paper and watched the Today show. I started to organize the grocery list and plan our meals for the week. It just popped into my head that I wanted to make baked beans. I grew up with my Vava's baked bean recipe and decided I would tackle that this evening. After talking to my mom and learning that those beans literally take a day to cook, I needed a plan B. My mom told me to grab the family cookbook she compiled and told me about a recipe for Calico Beans...I took a peek...and Calico Baked Beans it was for dinner last night!

This recipe was super easy and a little short cut from having beans bake in your oven all day. We had some kielbasa links from our meat CSA that we buy from a local farm, and these beans make a great sidekick to the kielbasa!

Fresh out of the oven.... 

Calico Baked Beans

1 can kidney beans
1 can garbanzo beans (chickpeas)
1 can of baked beans (any brand goes...I used regular Bush's Baked Beans)
1/2 cup of ketchup
1/4 cup of light brown sugar
2 Tbsp apple cider vinegar
1 small onion (diced)
8oz ground beef or turkey*

Preheat over to 350. In a lightly oiled skillet, saute meat and onion until the meat is almost cooked through.

Open and drain the kidney and garbanzo beans. Add those as well as the can of baked beans (do not drain or rinse the baked beans). Then add the remaining ingredients- ketchup, sugar, and vinegar. Cook for 3 or4 minutes until all ingredients are combined.

Transfer to a casserole dish and cook uncovered for approximately 30 minutes. (you can take a tiny taste of the beans and see if they're soft enough for your liking)

Just a note...the original recipe calls for 1lb of ground beef. I used some ground white turkey meat instead and used only about 1/2 lb to cut down on the calories a bit. As you can see from the picture above..I thought my beans were beefy enough with only half the meat!

Enjoy!


Monday, March 12, 2012

Still Loving Skinny Taste...

I seldom go into my kitchen and create stuff from absolute scratch..maybe once in a while..but I mostly get my recipes from blogs and websites. I have a huge folder on my work computer full of bookmarks of recipes I've tagged that go into the must try category. Lucky for me, my husband will eat anything I put in front of him. He never complains if it stinks, or if I become obsessed with one thing...like zucchini enchiladas..and we eat it weekly. So, most of the recipes I post on here are things that we've tried and I decide are good enough or something unique and different that I feel compelled to share. You'll also probably notice that I get really excited when I find a good site and the things I try off of it are all really good.

So, I might sound like a broken record...but I am seriously enjoying almost everything I've made on http://www.skinnytaste.com/

Another thing we enjoyed this past week...Arugula Salad with Penne, Chick Peas and Sundried Tomato. A friend on a message board posted about it...I read it and got somewhat excited since I had every ingredient but one in the house. Yes, it might be sad that things like that excite me..but to each his own.

Another big plus about this dish...I used it as a side dish..it kind of has a little bit of everything..then it was lunch the next day as well. The portions were huge and I loved that it complimented some steak we grilled and then stood alone as a dish by itself the next day as well. I was a little scared that we needed to eat it all in one night and feared the arugula would get weird and wilted and I wouldn't touch it with a ten foot pole..it would be like eating salad with dressing the next day..blechh. But, the arugula stayed nice and fresh for a good 2 days after I made it.

So...here's Skinny Taste's Arugula Salad with Penne...

getting mixed in my mixing bowl....

For slightly more appetizing pictures since I take all of mine with the handy cellphone cam...check out the original recipe here


Ingredients
3 cups baby arugula
6 oz Ronzoni Smart Taste penne pasta  (I used Whole Wheat Pasta from Trader Joe's)
1/4 cup sun dried tomatoes, chopped
2 tbsp extra virgin olive oil
2 tbsp balsamic vinegar (I used a fig balsamic which was sooo good!)
salt and fresh ground pepper to taste
1 cup canned garbanzo beans (chick peas), rinsed and drained
4 tbsp Parmigiano Reggiano, freshly shaved (I just used fresh grated)

Boil pasta and then rinse in cold water. Toss with all the ingredients and Enjoy! This makes 4 generous servings.

Just a note...if you have leftovers..I found the next day that the oil and vinegar absorbed into the pasta quite a bit and added an extra dash of each to freshen up the leftovers.

Monday, March 5, 2012

Crack Brownies

I saw this recipe on a blog and tucked it away in my Recipes to Try folder on my computer. How could I not with a name like Crack Brownies! This past weekend we were headed to a friend's house to see some remodeling they did and I wanted to bring along a little something...and I remembered the crack brownie recipe! I thought I could try it out since there would probably be a ton of picky foods...so if they weren't that good..I didn't necessarily have to take ownership of them!

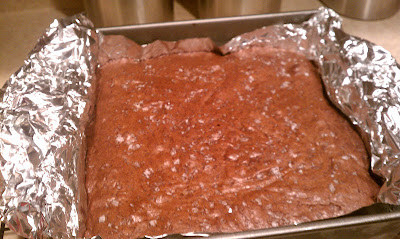
But, these did not disappoint they are a pretty damn good brownie..nice and fudgy with a secret ingredient to bring out the chocolate...Maldon Salt Flakes. It was funny to see people eat them..you could see them kind of look at the top wondering what was on them, take a bite, give a nod of approval and then ask...is it salt, or what am I eating?

So, overall I give the Crack Brownies a big huge thumbs up! Usually I bake and then it's operation get this stuff out of the house. However, 4 crack brownies are saved in a safe place for an evening snack for myself and the Mr.

So I pass on....Crack Brownies....

Here's the batter ready to go in the oven...one hint with brownies..go the extra mile and line your brownie pan with foil, let the edges hang over, and then grease the foil with crisco. You'll never have the fight of scraping a knife along the edges, or the edges come out and the middle is stuck there..makes for super easy clean pans and it's a cinch to get them out!

the secret ingredient..yeah it's salt flakes that cost me $8 but I rationalize that you can probably make 100 batches of crack brownies with one box.

 Fresh out of the oven
a little treat for my coworkers...

Crack Brownies
from www. theawl.com (here's the link)

1.5 sticks of butter
2 oz of unsweetened chocolate
1 cup of flour
2 cups of sugar
1/4 cup (heaping) of cocoa powder
3 eggs
2 tsp of vanilla
1 tsp Maldon salt flakes

Preheat your oven to 350 degrees.

In a small saucepan melt the butter and chocolate together. Allow it to slightly cool.

In a separate bowl, mix the dry ingredients, add eggs and vanilla and then the cooled butter and chocolate mix.

Take 1 teaspoon (mine was a heaping tsp) and evenly sprinkle the salt flakes on top of the brownies. Just make sure it's nice and even.

Bake for 35 minutes. Cool and cut into 16 brownies.

Thursday, February 23, 2012

Pork and Carrot Curry

I'm not really a huge curry fan...not that I hate it, but it's not something I really go out of my way to make or eat either. I'm also a habitual new recipe maker. My poor husband probably wishes I made more repeat recipes of the things we really really enjoy instead of being my constant kitchen guinea pig. The poor guy eats anything...doesn't matter how big of a kitchen disaster it is. This simple thing encourages me to try a million different things.

So, on one experimental feeling weekend, I was flipping through the latest issue of Clean Eating Magazine (http://www.cleaneatingmag.com/) and saw this recipe for a Pork and Carrot Curry. I had most of the ingredients on hand and gave a shot.

This recipe surprised me...it was really good. I thought the top ingredient would be curry powder, but the recipe uses different spices to make the flavor. I served it over brown rice and it might make it into the category of a repeat recipe in the Allan household. It was pretty easy to make, didn't take all that long, and we both liked it!

My poor beat up issue of Clean Eating..this bad boy has so many food smears on it..one thing I'm not is a tidy cook. The picture featured on the cover is the Pork and Carrot Curry

The Pork and Carrot Curry. Don't let my picture fool you into thinking it's not good. I take most of my blog pictures with my handy cell phone. I also realize I'm not the best photographer...usually my phone shadow is included in that picture and the recess lighting in my kitchen doesn't help! So, just trust me...it was pretty good!

Pork and Carrot Curry
(from Clean Eating Magazine)

Ingredients:
1/2 cup non-fat Greek yogurt
3 T minced fresh ginger
3 cloves garlic
1 t ground coriander
1 t ground cumin
1 t paprika (I used smoked paprika)
1/2 t ground turmeric
1/2 t sea salt
1/4 t cayenne pepper
1 lb. pork tenderloin, trimmed of excess fat and cut into 1-inch cubes
1 T olive oil 
1 yellow onion, halved and cut into thin wedges
1 can diced tomatoes, in their juices
10 oz. small fingerling potatoes, halved in length
3 carrots, trimmed, peeled, and cut into diagonal 1/4-inch thick slices
2 T coarsely chopped fresh cilantro leaves for garnish

Directions
1. In a medium bowl mix together the Greek yogurt and all the spices. Add the pork and toss to coat. Let sit at room temperature until you are ready to cook it, otherwise cover and marinade until you want to cook the pork or overnight if desired.

2. In a medium saute pan with a tight-fitting lid, heat the oil on low. Add the onion and cook, stirring constantly for about a minute. Then cover the pan and cook, stirring occasionally, for about 5 minutes.

3. Add the pork and marinade to pan. Stir in the tomatoes, potatoes, and carrots, plus 1/2 cup water.

4. Increase heat to medium, cover and simmer until pork is cooked through and the potatoes and carrots are fork-tender (~15-18 minutes).

5. Ladle into serving bowls and garnish with cilantro

I served this over brown rice. I didn't think ahead enough to marinade the pork overnight. I mixed the marinade and the pork sat in it as I prepared the veggies and other ingredients. I also went a little heavy on the carrots..maybe used 4 or 5.

Enjoy!

Monday, January 30, 2012

Homemade Kale Chips

This was one of those things that I heard about and never really got around to trying. Mr. Allan and I are heard about of town for a mini vacation and this weekend was a mission to clear the fridge of perishable items. I had a bunch of kale in the veggie drawer and thought..it'd be a great time to give this a whirl!

I had looked at some recipes last year and just kind of winged this...

First, take a bunch of kale and wash it thoroughly. Take each piece and rip it into bite sized pieces and try to omit using the stems and spines. Throw them in a large bowl, drizzle with olive oil. Spread onto a cookie sheet and season with salt. Cook at 300 degrees for about 20-22 minutes.


Here's (what's left) of the final product. They are these light crispy chips and they were so good. I think both myself and Mr. Allan were surprised at how roasting the kale on a lower temp could make them turn into such a crispy snack!


Kick Ass Kale Chips

1 large bunch of kale, washed, and torn into bite sized piece
1 Tbsp Olive Oil
1/2 tsp salt

Preheat oven to 300 degrees. Place kale in a large bowl. Drizzle with olive oil (you can eyeball the amount, but just make sure the leaves are mostly covered, don't drench it.)

Mix well and spread evenly on a cookie sheet. Season with salt. Cook for 20-22 minutes. Let cool and enjoy!

Monday, January 23, 2012

Cincinnatti Chili

I had never heard of this before some friends introduced us to it...and I'm a big chili lover. I love to make chili since it's so easy to substitute leaner meats, fill it with veggies and beans, and make a nice warm dinner. Last year we went over a friend's house and her husband made this dish. He had eaten it at an airport and we had heard him mention it before and tell us how much he enjoyed it. Cincinnati chili is basically a smokey chili served over pasta...and we loved it just as much as he did!

I was excited to open this month's Clean Eating Magazine and see a slimmed down "cleaned" up version. I thought it would be the perfect meal to accompany a day of football watching.

this month's Clean Eating..love this magazine!
Here's the Cincinnati Chili over about 1 cup of whole wheat spaghetti

Then I remembered I forgot the cheese...this was a perfect cold January meal and would be easy to make for a crowd. This recipe made dinner for myself and Mr. Allan, one night of leftovers, and then we froze the a container of chili to have on hand for later this winter.

Cincinnati Chili
from Clean Eating Magazine

1 large yellow onion, diced
1 lb extra lean (93%) turkey or beef
4 garlic cloves, minced
2 Tbsp chili powder
2 tsp dried oregano
1 1/2 tsp cinnamon
1/4 tsp allspice
1 Tbsp unsweetened cocoa
2 cups low sodium tomato sauce
2 cups low sodium beef broth
1 cup canned solid pumpkin
1 15 oz can of kidney beans
2 Tbsp apple cider vinegar
1 Tbsp honey
14 oz Whole Wheat Spaghetti
low fat shredded cheddar

Directions

Heat a large nonstick skillet on medium. Add onion and cook until softened. Add meat and cook until browned, about 5 minutes. Stir in garlic, chili powder, oregano, cinnamon, and allspice. Cook for an additional minute. Transfer mixture to a large dutch oven or stockpot.

Add cocoa, tomato sauce, broth, pumpkin, beans, vinegar and honey. Cook for about 30 minutes.

Cook pasta according to package directions and top with a scoop of chili and cheddar cheese.

Just a couple notes...the original recipe called for a slow cooker. Instead of transferring the meat mixture to a dutch oven, you could put it in the slow cooker and cook on low for 6 to 8 hours.

Enjoy!

Friday, January 6, 2012

Chicken Pot Pie Soup from Skinny Taste

It might not look like anything too special as it simmers in a pot on my stove...but this soup was down right delicious! It was just what we needed on a lazy Saturday afternoon when the temps dipped colder than they've been all year. This soup is a perfect low fat comfort food!


If you haven't checked out Skinny taste (http://www.skinnytaste.com/) it's a fabulous site with tons of recipes and all the nutritional info, weight watcher points etc! I printed off so many recipes and have been making a Skinny Taste meal (if not more!) a week.

Skinny Taste Chicken Pot Pie Soup

1/4 cup flour (to make gluten-free use 2 tbsp cornstarch instead)
2 cups water
4 cups fat free milk
1 large celery stalk, chopped
1/2 medium chopped onion
8 oz sliced baby portabella mushrooms
2 chicken bouillons
fresh ground pepper
pinch of thyme
10 oz frozen classic mixed vegetables (peas, carrots, green beans, corn)
2 potatoes, peeled and cubed small
16 oz cooked chicken breast, diced small
salt

Create a slurry by combining 1/2 cup of the cold water with flour in a medium bowl and whisk until well blended. Set aside.

Pour remaining water and milk into a large pot and slowly bring to a boil. Add celery, onion, mushrooms, chicken bullion, thyme, fresh pepper, frozen vegetables and return to a boil. Partially cover and simmer on low until vegetables are soft, about 20 minutes. Remove lid, add potatoes and cook until soft, about 5 minutes. Add chicken, and slowly whisk in slurry, stirring well as you add. Cook another 2-3 minutes, until soup thickens, adjust salt and pepper to taste and serve.

Here's a Link to the recipe on Skinny Taste complete with nutrional information and weight watcher points! Enjoy!

Monday, November 21, 2011

Skinny Taste Zucchini Enchiladas

 I know..everyone's talking turkey this week. Last night I went grocery shopping for the big eating holiday on Thursday also known as Thanksgiving. Smart move #1...go grocery shopping at or after dinnertime..no crowds whatsoever. But, besides the turkey, a million fresh herbs and all the other fixings..I also needed dinner for Monday thru Wednesday as well. I've written about a couple good recipes I've gotten off of www.skinnytaste.com. But, this one is my favorite from the site. I made it a couple weeks ago and we had it again last night. It's not too bad of a recipe, maybe 20-30 minutes prep and 20 minutes to cook.

Zucchini enchiladas right before they were popped in the oven...my sprinkling of cilantro is a little sad looking..but the cutting board was washed and the cilantro back in the fridge by the time I realized I should've chopped a bit more..

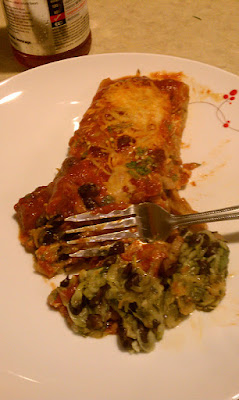
my dinner plate last night...it might not look like a gourmet meal but they were good!


Zucchini Enchiladas

cooking spray
1 tsp olive oil
2 cloves garlic, crushed
2 medium scallions, chopped
1/4 cup cilantro, chopped
2 medium zucchinis, grated
kosher salt and fresh ground pepper
1 1/2 cups grated reduced fat mexican blend cheese
4 Large La Tortilla Factory Low Carb tortillas
chopped scallions (optional)
chopped cilantro (optional)
* I also added a can of black beans
 
Enchilada sauce:
1 garlic cloves, minced
1 tbsp chipotle chilis in adobo sauce (optional for more heat)
1 cups tomato sauce
1/4 tsp chipotle chili powder (to taste)
1/4 tsp ground cumin
1/2 cup fat free vegetable broth
kosher salt and fresh pepper to taste

To make the Enchilada sauce...I threw everything in a small sauce pan first. It simmered while I prepped the filling. Just stir it occasionally.

For the filling: Saute zucchini, garlic, and scallions. Add salt and pepper to taste. (I then added the black beans at this point) After about 5-7 minutes, remove from heat and mix in 1/2 cup cheese. Place filling in a tortilla, roll up and place in a casserole dish seam down. Once all the tortillas are filled (the original recipe makes 4, with the addition of the beans, I made 5 enchiladas). Cover with the enchilada sauce and top with additional cheese, scallions and cilantro. Bake at 400 for 20 minutes.


Servings: 4 • Serving Size: 1 large enchilada •
Calories: 258.7 • Fat: 13.5 g • Protein: 22 g • Carb: 30.2 g • Fiber: 16.9 g

Tuesday, November 8, 2011

Arugla, Prosciutto and Fig Pizza

It might not look like much...but this was one kick ass pizza. I've been on a big pizza kick ever since I found this pizza crust

I buy my Top This pizza crusts at Whole Foods and Dave's Marketplace here in RI. I like these because they're already grilled..all you have to do is heat them up. I throw them on my pizza stone with my pizza toppings and they're done in 10-12 minutes. Also...the nutritional value on these is pretty good...1/4 of the pizza crust has 130 calories and 1 gram of fat. My favorite..the whole wheat. Check them out at www.topthispizzacrusts.com

But...onto my creation last night....this is a whole wheat Top This pizza crust with gorgonzola cheese, figs, prosciutto and arugula. I thought it was pretty fabulous. I took some figs, sliced them up and threw them in a bowl with some balsamic vinegar. I let them sit for about an hour while I got distracted from cooking dinner..probably for something important like the latest episode of the Real Housewives of Beverly Hills.

I took my pizza crust and covered it with a small container of gorgonzola cheese. I baked it at 450 degrees for 12 minutes.  Once out of the oven, I placed the balsamic soaked figs on top. I then put fresh slices of prosciutto over the figs. I took a bunch of arugula..washed it, then tossed it with some olive oil (only a little bit..maybe a tsp or two) and also some balsamic vinegar. I topped the pizza with the arugula.


I loved the tangy taste of the cheese, the sweetness of the figs and the peppery taste of the arugula made for a pretty nice combo. The only thing I'd do differently next time...maybe cut up my slices of prosciutto. I just threw them on there..if you got a bite of prosciutto, it was a mouthful!

Tuesday, October 18, 2011

Chocolate Pumpkin Cupcakes with Ginger Pumpkin Buttercream

this might not look like much....but this is one of my FAVORITE frosting recipes...the cupcake is pretty good too...but the frosting is hands down amazing!


I can't remember where I got this recipe. It's been hanging around my recipe box for a couple years and I love to use it around this time of year...when it starts to get cold, it's nice to have the oven on and everyone is enjoying everything pumpkin. I believe the original recipe was for a ginger buttercream...I had some leftover pumpkin from making the cupcakes and threw a bit in...and the Ginger Pumpkin Buttercream was born.

Pumpkin Chocolate Cupcakes
makes around 30 cupcakes

2 1/2 cups flour
2 Tbsp flour
1 cup cocoa powder
1 tsp baking powder
1 1/2 tsp baking soda
2 1/4 tsp cinnamon
3/4 tsp nutmeg
3/4 cup buttermilk
1 1/2 cup pumpkin
1 1/2 tsp vanilla
2 1/4 sticks unsalted butter
1 1/2 cup dark brown sugar
1 1/2 cup sugar
5 eggs

Preheat oven to 350 degrees. Sift together lour, cocoa, baking powder, baking soda, cinnamon and nutmeg and set aside. In a separate bowl, combine pumpkin, buttermilk and vanilla and set aside. Beat together butter and sugars until light and fluffy. Add eggs one at a time. Alternatively add flour mixture and buttermilk/pumpkin mixtures to mixer until combined.

Line muffin pan and scoop around 1/4 cup of batter into each. Bake for approximately 20 minutes or until a toothpick comes out clean.

Ginger Pumpkin Buttercream

2 sticks unsalted butter at room temperature
1 tsp cinnamon
1/2 tsp salt
1/2 cup pumpkin
1/2 tsp ground ginger
1 tsp vanilla
2 lbs powdered sugar

beat butter and add spices, vanilla and pumpkin. Slowly add powdered sugar. (I add about 1/4 of the bag at a time and mix it well).

Like I previously mentioned...I LOVE this frosting...the cupcake recipe is pretty good but it has a lot of ingredients to it (and a lot of butter in it!). If you're not feeling the cupcake recipe, you could always grab a box cake mix...maybe add a 1/2 cup of pumpkin, or just do a plain chocolate cupcake as well!

Enjoy!

Thursday, October 13, 2011

Skinny Taste

I think my sister gets credit for first telling me about this fabulous website. Then..I heard a couple mumbles and grumblings about it from other friends and sources as well. So, this past weekend I decided to dive in and try a couple recipes from www.skinnytaste.com.

Here's a little peek at this great recipe website!

So what did I try and why did I like them?

First up...Skinny Taste Spinach Lasagna Roll Ups

photo courtesy of www.skinnytaste.com

I made these for some dinner guests..ok my dad, step mom and 4 yr old nephew...but they were received with RAVE reviews from them as well as Mr. Allan. Even my nephew ate an entire roll by himself. They were a breeze to make (I also used the marinara recipe on skinny taste as well), a crowdpleaser, and made excellent leftovers as well. I also love that all nutritional info as well as WW points are listed!


SkinnyTaste Spinach Lasagna Rolls
Servings: 9 • Serving Size: 1 roll • Old Points: 4 pts • Points+: 6 ww pts
Calories: 224.9 • Fat: 5.1 g • Fiber: 3.4 g • Protein: 13.0 g • Carbs: 31.5

9 lasagna noodles, cooked
10 oz frozen chopped spinach, thawed and completely drained
15 oz fat free ricotta cheese
1/2 cup grated Parmesan cheese
1 egg
salt and fresh pepper
32 oz tomato sauce
9 tbsp (about 3 oz) part skim mozzarella cheese, shredded

Preheat oven to 350°. Combine spinach, ricotta, Parmesan, egg, salt and pepper in a medium bowl. Ladle about 1 cup sauce on the bottom of a 9 x 12 baking dish.
Place a piece of wax paper on the counter and lay out lasagna noodles. Make sure noodles are dry. Take 1/3 cup of ricotta mixture and spread evenly over noodle. Roll carefully and place seam side down onto the baking dish. Repeat with remaining noodles.

Ladle sauce over the noodles in the baking dish and top each one with 1 tbsp mozzarella cheese. Put foil over baking dish and bake for 40 minutes, or until cheese melts. Makes 9 rolls.

To serve, ladle a little sauce on the plate and top with lasagna roll.
 
Enjoy!

Thursday, September 22, 2011

Pumpkin Mousse

it's the perfect fall dessert...one of our favorites and an occasional treat I make for Mr. Allan. I go into absolute pumpkin overload once September hits and I realize it's time to pack up the bathing suits, quit caring about how dark my legs are and come to terms with the fact that I have to start wearing pantyhose and closed toe shoes to work again. So, this recipe came out of the archives. It's pretty low calorie but I don't make it a ton because it has some ingredients I try to stay away from...fake stuff like fat free cool whip and such. I've tried to think of some alternatives...but nothing has quite worked out for me yet!

So...here's the old go to maybe not the healthiest thing for you but at least low cal pumpkin mousse recipe!

Pumpkin Mousse
from some Weight Watcher meeting somewhere

1 can of pure pumpkin (not pumpkin pie filling)
1 cup skim milk (you can use any kind..I used Almond Milk)
1 pkg sugar free fat free pudding (vanilla or butterscotch work best)
1 tsp pumpkin pie spice
1/2 tub of fat free cool whip

whisk together pudding and milk. Add pumpkin and spice. Fold in cool whip. Chill and serve with a dollop of cool whip and an additional sprinkle of pumpkin pie spice.

Just a couple notes...if you want it more mousse like and a little less pumpkin...you can reduce the pumpkin to 1 cup, the milk to 1/2 cup and the cool whip to 1 cup. There are a million variations of this recipe..so play around with it until you get a consistency you like!


Tuesday, September 13, 2011

Home Made Marinara

I was quite proud of our little raised bed garden this year. We stuck to our guns and kept as garden as organic as possible. We used no type of fertilizers or pesticides, and I think we did pretty well...that was until Hurricane Irene blew the garden over!

One thing that I haven't done well with in the past but turned out stellar this year...tomatoes. We live in the woods and one big problem we've faced every year is a fungus called blight. Since the conditions in the woods is typically damp, it's attacked our tomatoes in years past. Usually when there's a summer with a lot of rain...this kills us. This year we took extra precaution by placing piles of mulch around the base of each plant, we made sure to only water in the morning and later in the season, when a couple bottom branches began to yellow, we promptly cut them off.

The result....bowls and bowls of these.


so, I decided to make some fresh sauce. I've attempted this in the past and the process of boiling, peeling, and deseeding tomatoes is kind of a long one. I found other recipes that put the entire tomato in a food processor or blender but in the end, just went back to the old fashioned way of doing it. Here's what it looks like.

I took a paring knife and on the bottom of each tomato cut a big X..just deep enough to pierce the skin. Boil a pot of water and in goes the tomatoes. They stay in there a minute or two..just until you see the skins peel back.

Take the tomatoes out of the boiling water and place them immediately in an ice bath. This is so they can cool off and allow you to peel the skins and squeeze the seeds out.
 Here's what your peeled tomatoes look like..


I just take the tomato and squeeze. The seeds will shoot out. You can then take a paring knife and cut the base where the stem was out as well. Then you have a big bowl of tomato guts.

Since I had a lot of large tomatoes, I just roughly ran a knife through them to break them up a little bit. In a large pot I combined 1/4 cup of extra virgin olive oil, 4 cloves of crushed garlic, 1 grated carrot, and 1 medium diced vidalia onion. I sauteed the veggies for 5 minutes, then added the tomatoes. I added a splash of red wine with one batch...once I drank all the wine and had none left..the next batch got a splash of balsamic vinegar. I let the mixture simmer for about 2 hours and then added some seasoning..mostly some salt, basil, oregano and parsley.

The finished product, in it's tupperware and ready for the freezer. 
You can use this sauce for anything. I top i over some whole wheat pasta and top it with fresh basil and a good quality Parmesan! I also like this sauce because it's a good way to use the uglier, maybe not so perfect, tomatoes in your garden!

Thursday, August 25, 2011

Peanut Butter Cookie Covered Oreos...

say that five times fast...this is a very very decadent treat..okay, maybe not insanely decadent..more like a huge splurge of a treat. This is something I make then I immediately devise the exit plan for these to leave my house so I won't eat them, because let's face it, a peanut butter cookie is bad enough for you..then putting an Oreo cookie inside is a little heart attack. But, if you're looking for a crowd pleasing treat that's a little different...this fits the bill.

it starts off with a big ass batch of peanut butter cookie dough

After the dough is chilled, I took two little 1inch of so balls of cookie dough. I pressed one on top of the oreo, the other on the bottom and formed it around the cookie.

Here they are fresh out of the oven..as you can see..too much cookie dough makes for ill shaped cookies...there was definitely a little bit of a learning curve to get a nice shaped final product

 Although they're probably one of the unhealthiest things I've eaten all year long..they were good! A glass of milk is needed to go with it!


Peanut Butter Cookie Covered Oreos

1 cup (2 sticks) unsalted butter
1 cup peanut butter
1 cup granulated sugar
1 cup brown sugar , packed
2 eggs
3 cups all-purpose flour
1 teaspoon baking powder
1/2 teaspoon salt
1 1/2 teaspoons baking soda
28 Peanut Butter Oreos (1 package)
 
In the large work bowl of a mixer, cream together the butter, peanut butter, and both sugars until smooth. Add eggs, one at a time, making sure each is fully mixed in

In a medium bowl, stir together the flour, baking powder, salt, and baking soda. Slowly stir in flour mixture, 1/3 at a time until completely incorporated. Refrigerate dough for 1 hour.

Preheat oven to 375 degrees F. Line two baking sheets with parchment paper.

Place 1 tablespoon of cooking dough on top of an Oreo cookie. Place a second tablespoon underneath. Gently press the dough down around the Oreo, sealing the cookie dough edges together so that no Oreo shows through. Transfer the cookie to a prepared baking sheet and repeat, leaving about 1 1/2 inches between each cookie. Bake for 10-12 minutes, or until cookies have just started to brown around the edges. Cool on baking sheet for 5 minutes, then transfer to a cooling rack.

Monday, July 18, 2011

Homemade Walnut Pesto

What's a girl to do when she's got about 10 colanders worth of this stuff....

It's official pesto making time...time to pick all my basil and replant before it starts to flower. This past week I made two huge batches of homemade pesto. One container is in the fridge and the others get thrown in the freezer so we can enjoy it all winter long.

I make my pesto a little different...instead of pine nuts or pignoli nuts, I use walnuts.

Some garlic, some decent quality olive oil, and cheese round out the ingredients. Pop them in the food processor and you have this...


I usually double the recipe, although every time I do I struggle a bit with getting all the ingredients into my 8 cup food processor.

Pesto with Walnuts and Garlic

3 cups loosely packed basil leaves
4 peeled garlic cloves
1 1/2 cups walnuts
3/4 cup of Olive Oil
1/4 cup Parmesan Cheese

Place basil, garlic, cheese and walnuts in a food processor and pulse until well combined. Stream in olive oil. Be sure to scrape sides well (especially the bottom near your blade).

Just a couple notes...the original recipe I found for this called for double the oil. I found it to be way too much. I cut it down to 3/4 of a cup. Since I primarily freeze my pesto, when I thaw it and put it in a dish, I do add a little bit more olive oil. For example, I made a Pesto Scallop dish with pasta. Once the pasta was cooked and the pesto added, I poured in an additional 1/4 cup of olive oil to mix with the pasta.

Also...I always just buy a hunk of Parmesan cheese at my local grocery store. This time I decided to splurge a little and bought some Parmesan from Whole Foods. I can't describe the difference in quality. Sure, it was a couple bucks more, but so much better than the run of the mill stuff at my big grocery store.


Friday, July 15, 2011

Easy Fresh Healthy Summer Dinner

I planted the garden a little late this year, so right now I have tiny baby tomatoes, green beans, lots of baby squash and cucumber plants that are loaded with flowers. One thing that is going absolutely crazy in my garden that I typically have absolutely NO luck with...tomatoes! The past couple years we've had the worst blight...a fungus that turns the leaves yellow with little black dots and the leaves eventually dry up as it crawls up the plant. With proper precautions...our tomatoes are thriving...I've never seen so many before!

So, it was time to whip out as many recipes that match up with what we're growing. Last night, a recipe by Ellie Kreiger from the Food Network...a simple cherry tomato pasta. Fresh, easy, and oh so good.

I've got lots of these


and made lots of this


Cherry Tomato and Basil Pasta
from Ellie Kreiger

1 pound whole wheat pasta
3 cups of cherry or grape tomatoes
4 cloves of garlic
1/2 cup basil
1/4 cup Parmesan cheese
3 tbsp Olive Oil
Salt and Pepper to taste.

Boil a large pot of water. Salt and cook pasta according to directions. While pasta cooks, thinly slice 4 garlic cloves. Heat a large skillet with oil. Add garlic and saute for about 8-10 minutes until it is brown. (be careful...you look away for 2 seconds and garlic can burn!) Add cherry tomatoes and cook for about 5 minutes until the tomatoes soften, but keep their shape. Once pasta is done, drain and add pasta to the skillet with tomatoes and garlic. Add about 1/3 of a cup of basil and half of the cheese. Toss and add salt and pepper. Place in a serving dish and top with additional basil and cheese.